
On a a pool equipped with a manual vacuum cleaner, half of the suction problems come from a poor valve configuration in the technical room. We connect the hose to the vacuum port, start the pump, and the dirt rises through the return jets instead of going to the filter. The problem is almost never the vacuum port itself, but the distribution of flow between the different pipes.
Risk of cavitation on variable speed pump and vacuum port
Variable speed pumps have become common since the application of Regulation (EU) 2019/1781 on the ecodesign of electric motors. These pumps usually run at low speed to reduce consumption. When switching to the vacuum cleaner, it is necessary to switch to a high flow rate mode; otherwise, the suction remains insufficient to dislodge the deposits from the bottom.
Read also : How to Solve Common Issues with the Peugeot 2008: From Lighting to Engine
If we abruptly close the skimmer and bottom drain to send all the power to the vacuum port, the pump can run dry and overheat. Recent manufacturer manuals emphasize this point: it is necessary to limit the flow by partially (not completely) closing the other valves.
With a traditional fixed-speed pump, the margin for error is larger. With a variable speed pump, an overly aggressive closure can cause loss of prime in a matter of seconds.
Related reading : How to Choose the Right Pair of Shoes to Relieve Hallux Rigidus?
To ensure the optimal operation of the pool vacuum port, we start by increasing the pump speed to maximum before adjusting the valves, then we gradually reduce the opening of the skimmers until we feel a strong suction at the vacuum head.
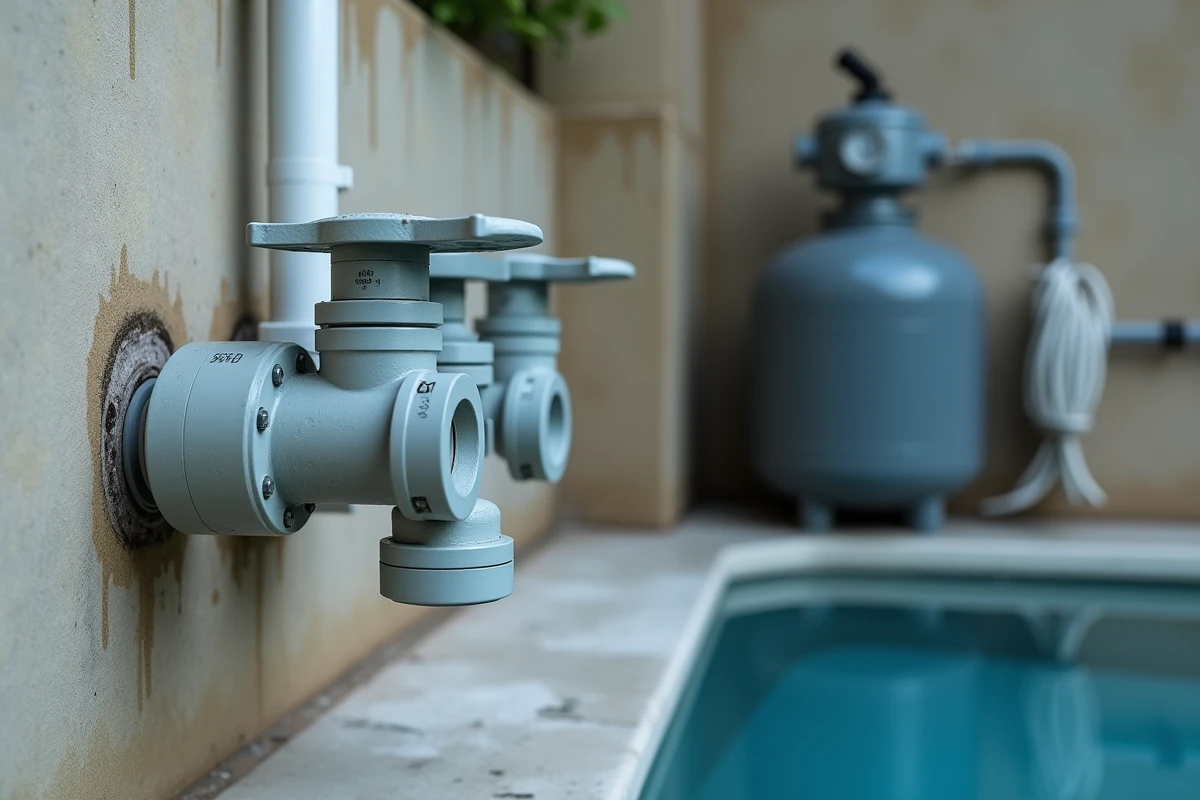
Skimmer valve and bottom drain: what precise setting for vacuuming
The logic is simple on paper: we want all the suction power to go through the vacuum port. In practice, completely closing the skimmer valve poses a real problem on newer installations. Skimmers with low water reserves (slim models or overflow gutters) lose their water charge very quickly. The result: an air intake in the pipe, a loss of prime in the pump, and we start from scratch.
Feedback from professional pool technicians converges on a three-step adjustment:
- Close the bottom drain valve to about three-quarters to cut off most of the suction from the bottom without cutting off the water supply to the pump
- Reduce the skimmer valve to a quarter open (a trickle of water is enough to maintain priming), never closing it completely
- Leave the vacuum port valve wide open, as it collects the majority of the flow
Feedback varies on this point depending on the type of pool. In an overflow pool, the gutter continuously feeds the buffer tank, which changes the situation. In this case, we can close the skimmer more without the risk of losing prime because the buffer tank acts as a water reserve.
6-way valve of the sand filter: filtration or waste
During vacuuming, the multiport valve remains in the “Filtration” position in the vast majority of cases. The water being vacuumed passes through the filter, impurities remain in the sand, and clean water returns to the pool through the return jets.
The “Waste” position is only justified for very heavy deposits: decomposing algae after a shock treatment, fine dirt after a storm, sand blown in by the wind. In waste mode, the water goes directly to the drain without passing through the filter. We lose water volume in the pool, and it will need to be compensated with a refill. Using this position out of habit amounts to wasting water and complicating the maintenance of chemical balance.
Handling errors that damage the pool’s hydraulic circuit
We often see owners manipulating the 6-way valve while the pump is still running. This habit prematurely wears out the star seal inside the valve. Always stop the pump before changing the position of the multiport valve. The operation takes five seconds and avoids costly repairs.
Another common mistake: forgetting to purge the air from the vacuum hose before connecting it to the vacuum port. We submerge the hose in the water segment by segment, starting from the vacuum head, until no more bubbles come out. Connecting a hose filled with air sends a large air pocket directly into the pump, which can cause immediate loss of prime.
Visual inspection in the technical room during vacuuming
During the first few minutes of vacuuming, a visit to the technical room allows us to check three things:
- The transparent cover of the pump pre-filter does not show continuous air bubbles (a sign of air intake in the suction circuit)
- The pressure gauge of the sand filter remains within its normal range (a rapid rise indicates a clogged filter that will need to be cleaned before continuing)
- The flow at the return jets remains perceptible (if it drops suddenly, a valve is mispositioned or the pre-filter basket is full)
Cleaning the pre-filter basket before each vacuuming session takes thirty seconds and ensures stable flow throughout the cleaning process. A basket half full of leaves significantly reduces suction power, and we end up spending twice as long in the pool for a mediocre result.
Adjusting the valves for the vacuum port is not complex once you understand the principle: concentrate the flow on the vacuum port without cutting off the water supply to the pump. The only variable that changes from one installation to another is the degree of closure of the skimmer and bottom drain valves, which depends on the type of pool and the installed pump. After two or three sessions, the correct adjustments become second nature.